Apply price model

To apply a , you must link it to a vehicle.

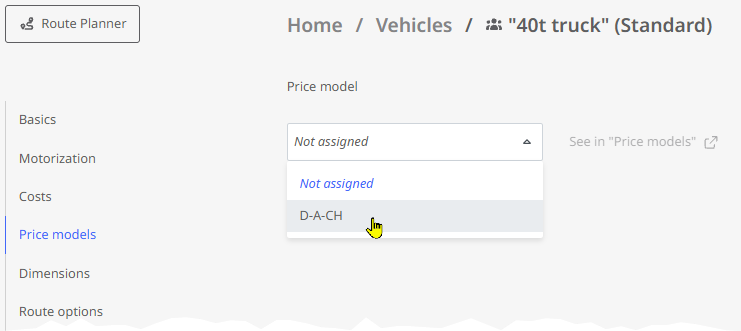
  1. To do this, go to Vehicle Management and select the vehicle you want to edit.

  2. In the vehicle profile, go to the “Price models” section and select the price model you want to assign.

    Note: If the vehicle profile is a public profile, the price model must also be public.

  3. Click <Save and Close> to apply the change.

Note: The link between a vehicle and a price model is visible on the overview page in the "Price models" module.

  1. Now calculate the desired route using the vehicle to which you have assigned the price model.

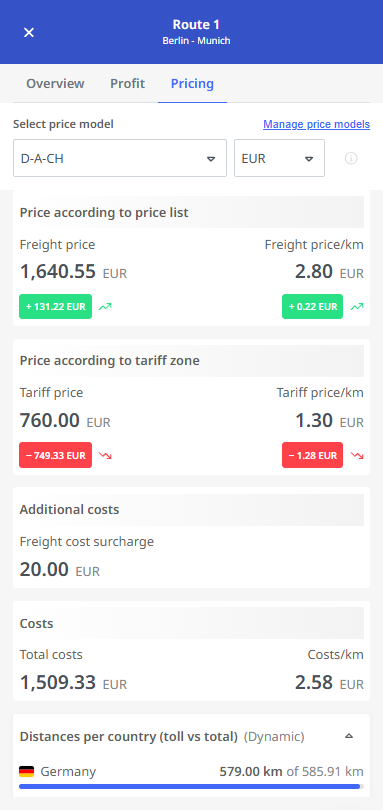
  2. In the results view on the right side of the window, open the “Pricing” tab.

    Here you will find the following information:

    • the price, as calculated using the price list (if defined)

    • the price calculated based on the tariff zones (if defined)

    • calculated freight surcharges (if defined) for the stops along the route

    • the total cost of the route, excluding the pricing model—for comparison

    Below the prices listed in the price list and rate zone, the difference from the total cost without the price model is displayed. A positive amount in green indicates that you are making a profit at this price—a negative amount in red means you are incurring a loss.

The “Select price model” field displays the price model assigned to the vehicle. However, you can also select a different price model for a quick comparison. You can also adjust the currency used for the calculation. However, changes to these settings are not saved—the next route calculation will use the values from the model linked to the vehicle.

Note: Since pricing based on a price list refers to the data in the cost profile, a message will appear if no cost profile has been assigned to the vehicle (either for the specific route or as a general assignment). Click the link in the message to go to the vehicle management and assign a cost profile to the vehicle for the route.